Welcome to Board.Vision Tutorials!
In this tutorial, we will walk you through the steps to upload meeting minutes.
Important Note: The Board.Vision web app is optimised and supported for desktop use on Google Chrome (version 65.0 and later) and Microsoft Edge (version 87.0 and later).
To upload meeting minutes:
1) Log in to your Board.Vision account using your registered email address and password.
2) From the left navigation menu, go to Meetings & Events, and click on the Meeting.
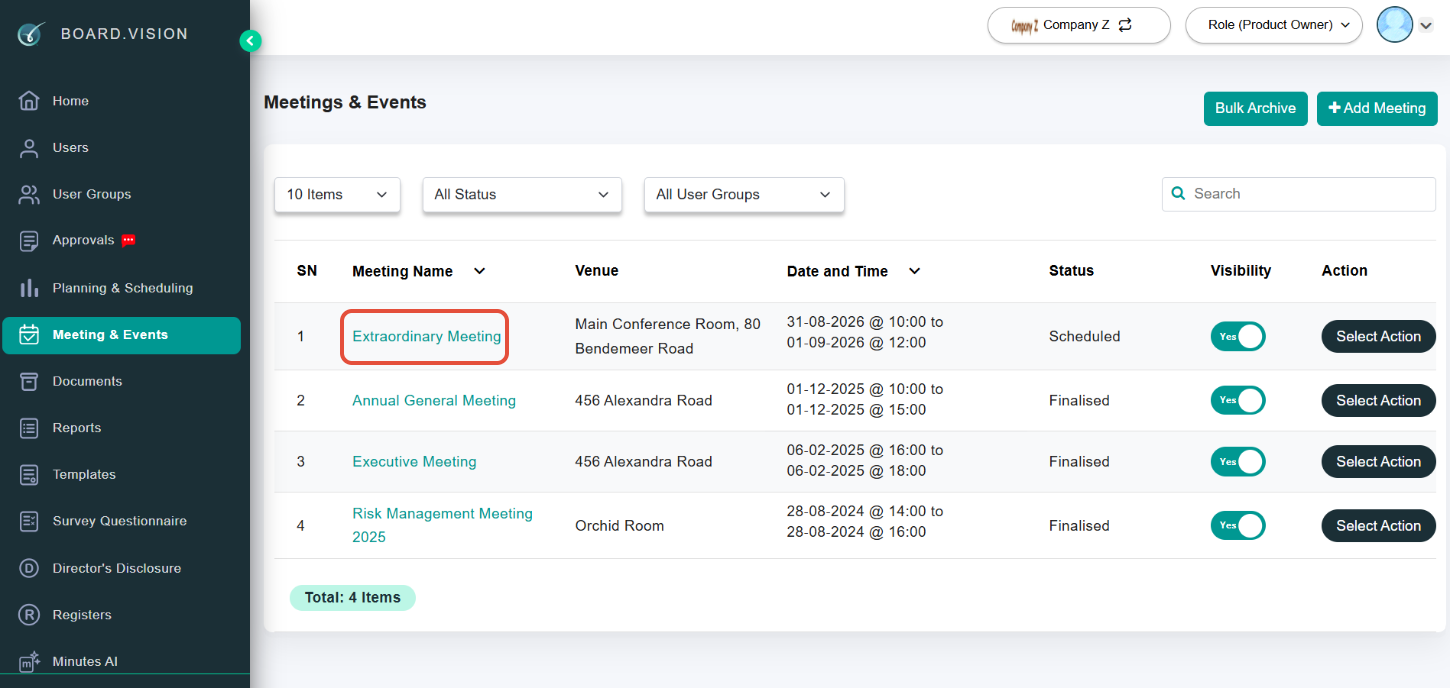
3) Go to the 'Agenda' tab.
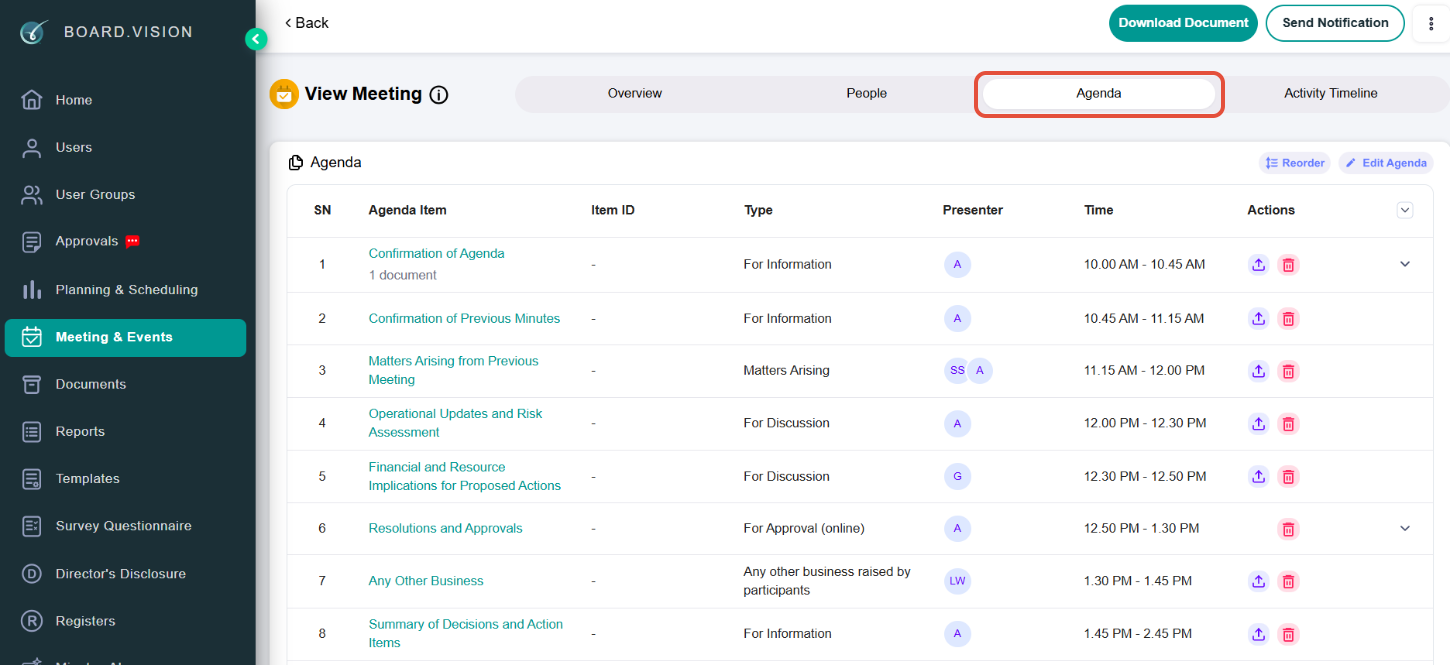
4) Scroll to the 'Minutes' section and click on Add Minutes.
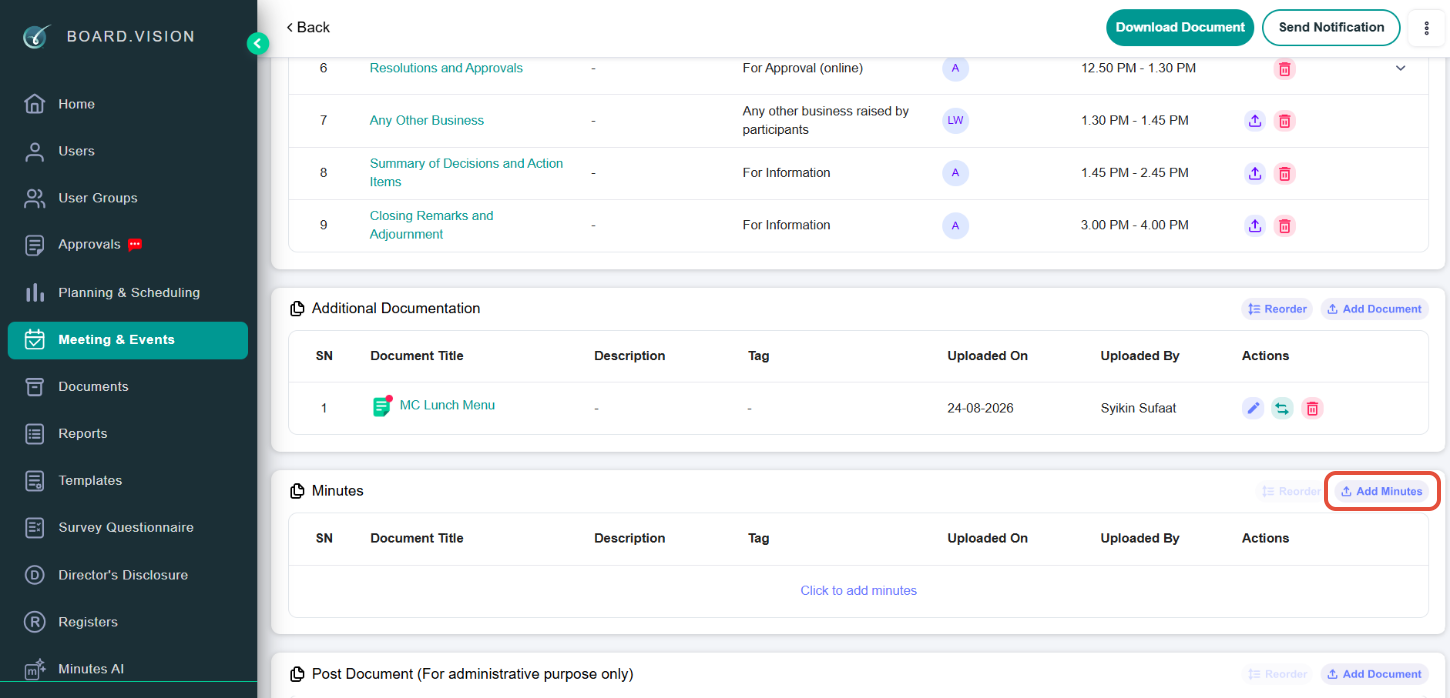
5) Click Your Device or drag/drop the agenda document into the upload area. You may also select a document you have saved in the Record Management System.
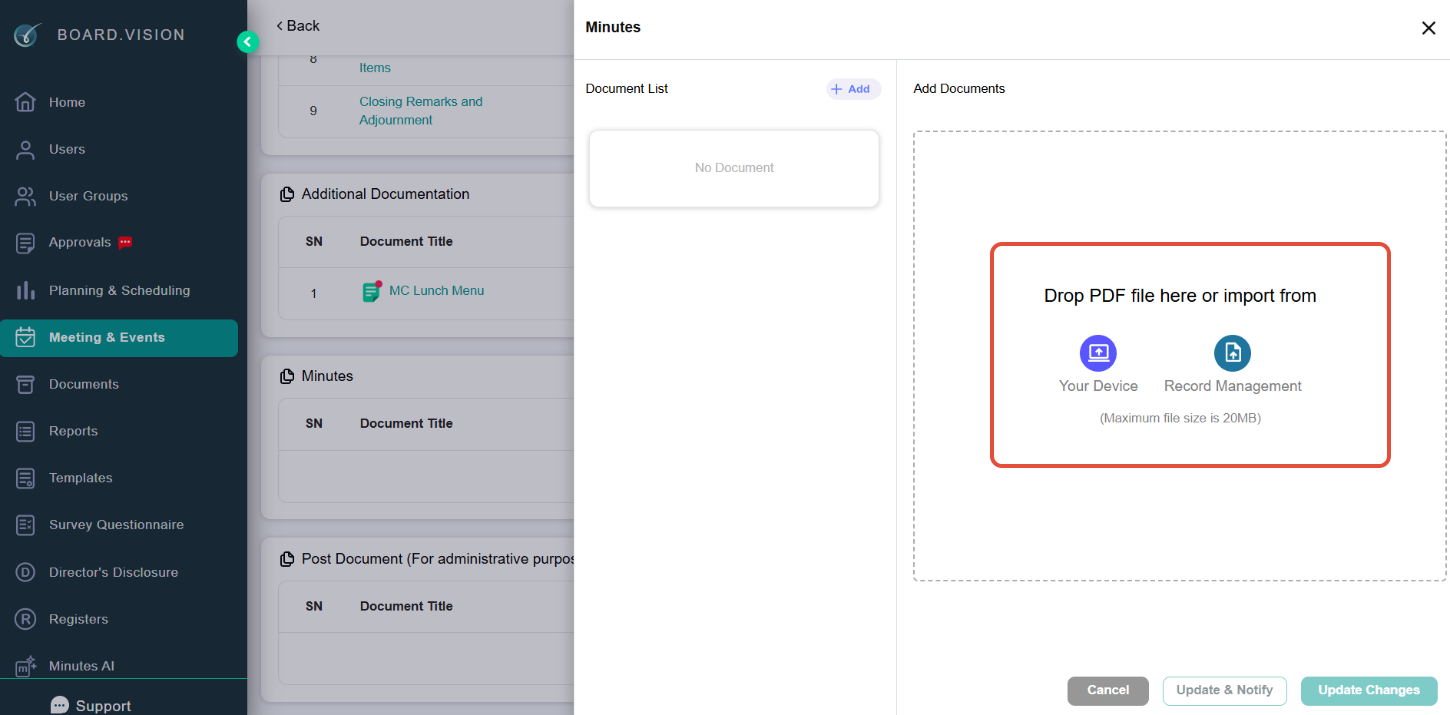
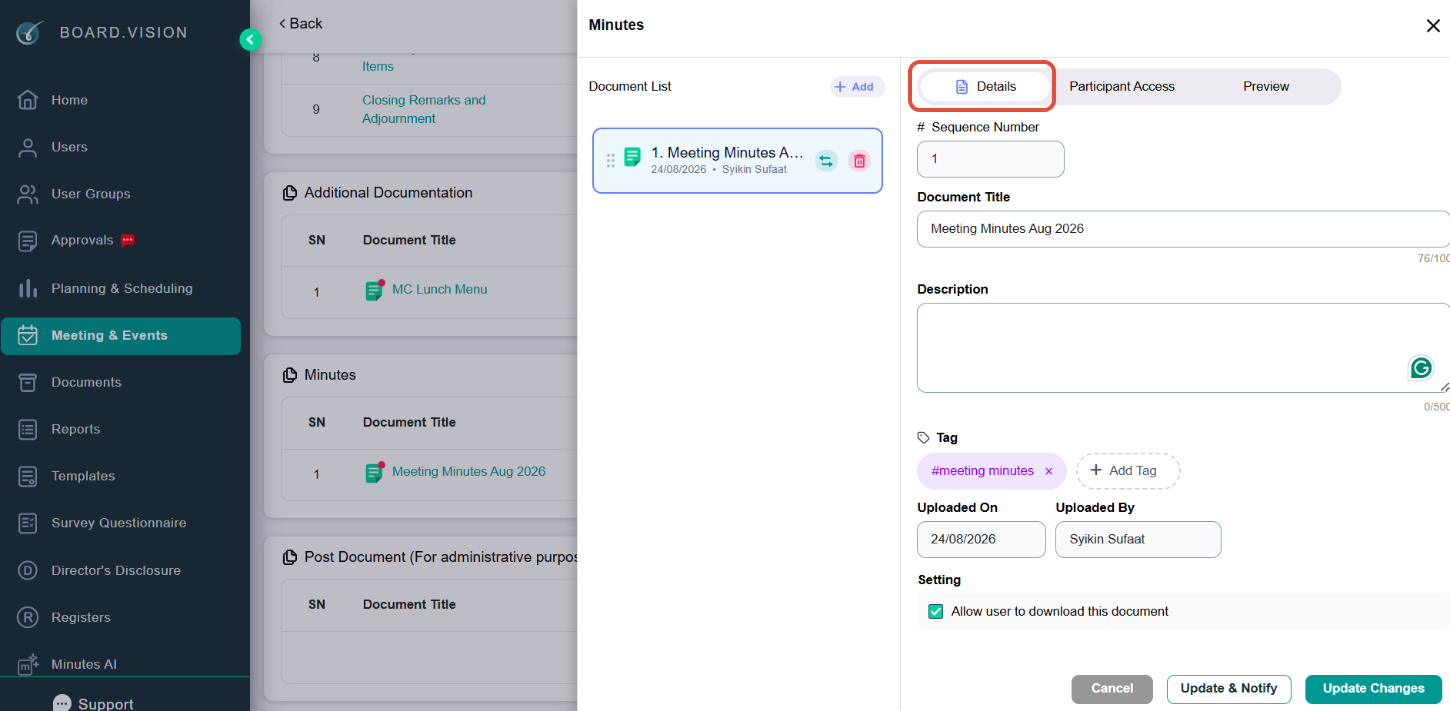
6) Under 'Details', update the document title, description, add tags and configure the settings as required.
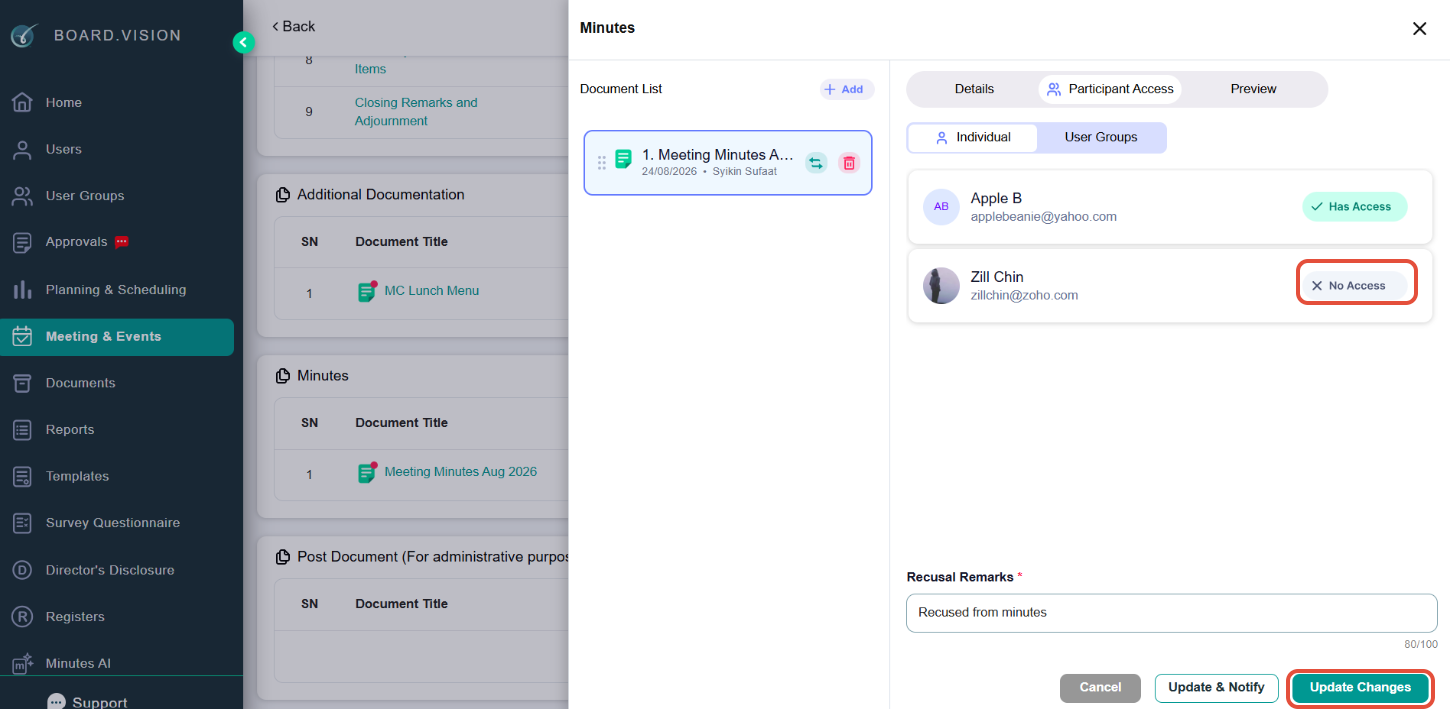
7) Under 'Participant Access', select users who should be recused from viewing the minutes and update the Recusal Remarks if necessary.
Click Update Changes.
Informing Participants on Minutes Uploaded
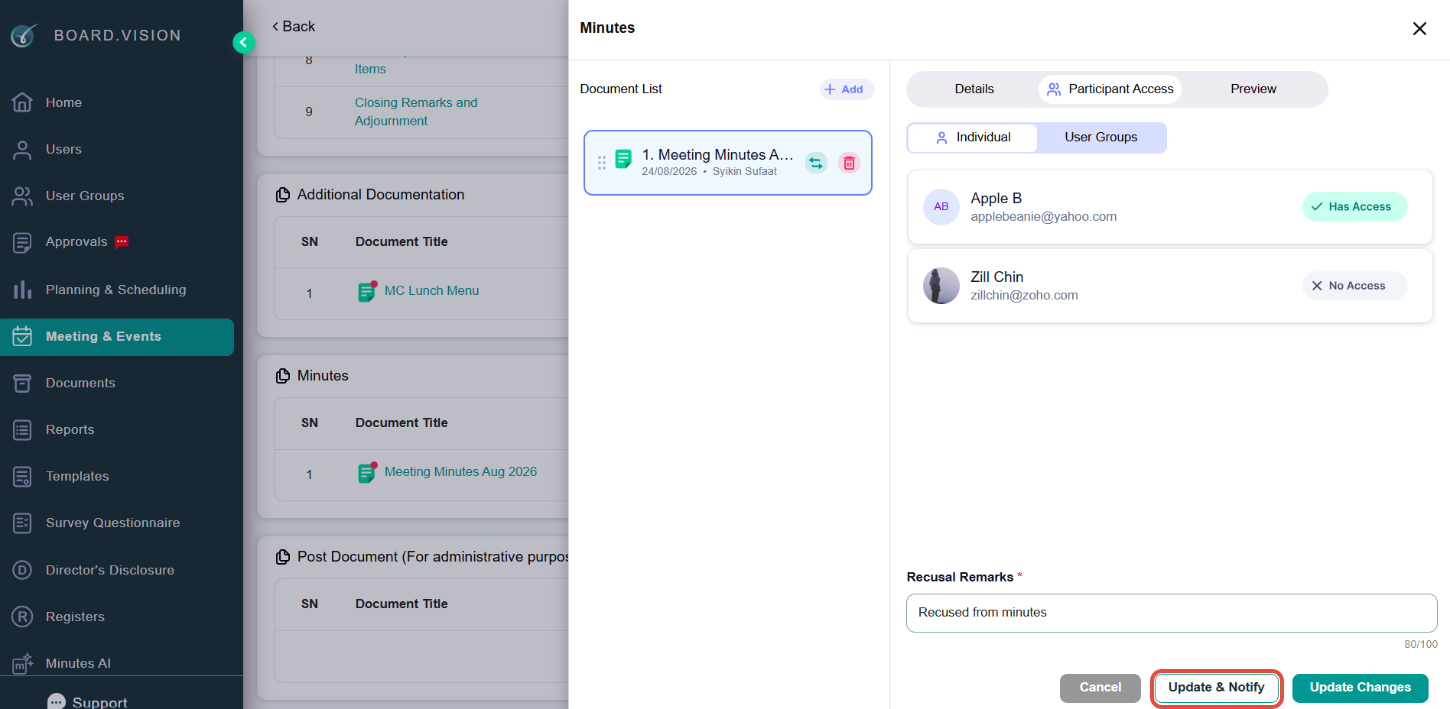
8) Click Update & Notify.
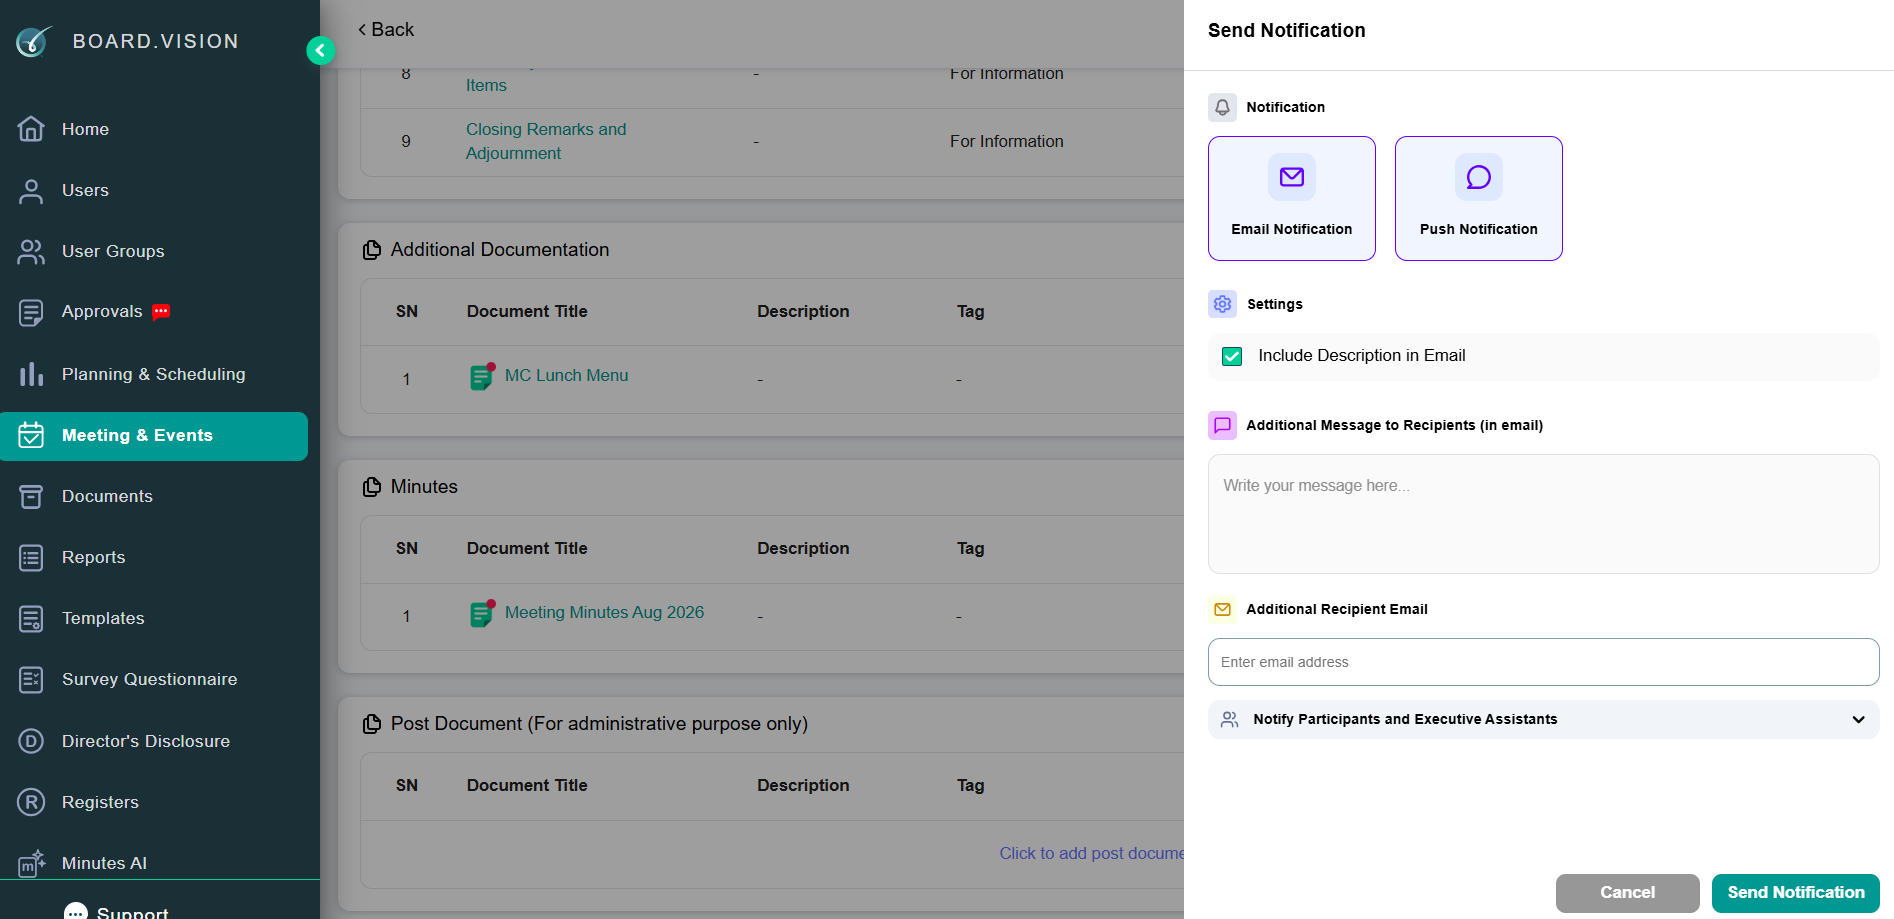
9) On the Send Notification pop-up, select how you would like to send notifications:
- Email and/or Push Notifications
- Notify all participants and their EAs
Was this article helpful?
That’s Great!
Thank you for your feedback
Sorry! We couldn't be helpful
Thank you for your feedback
Feedback sent
We appreciate your effort and will try to fix the article